Timesheets is one of the core section of the system. Here you can add and approve shifts, issue invoices and much more.
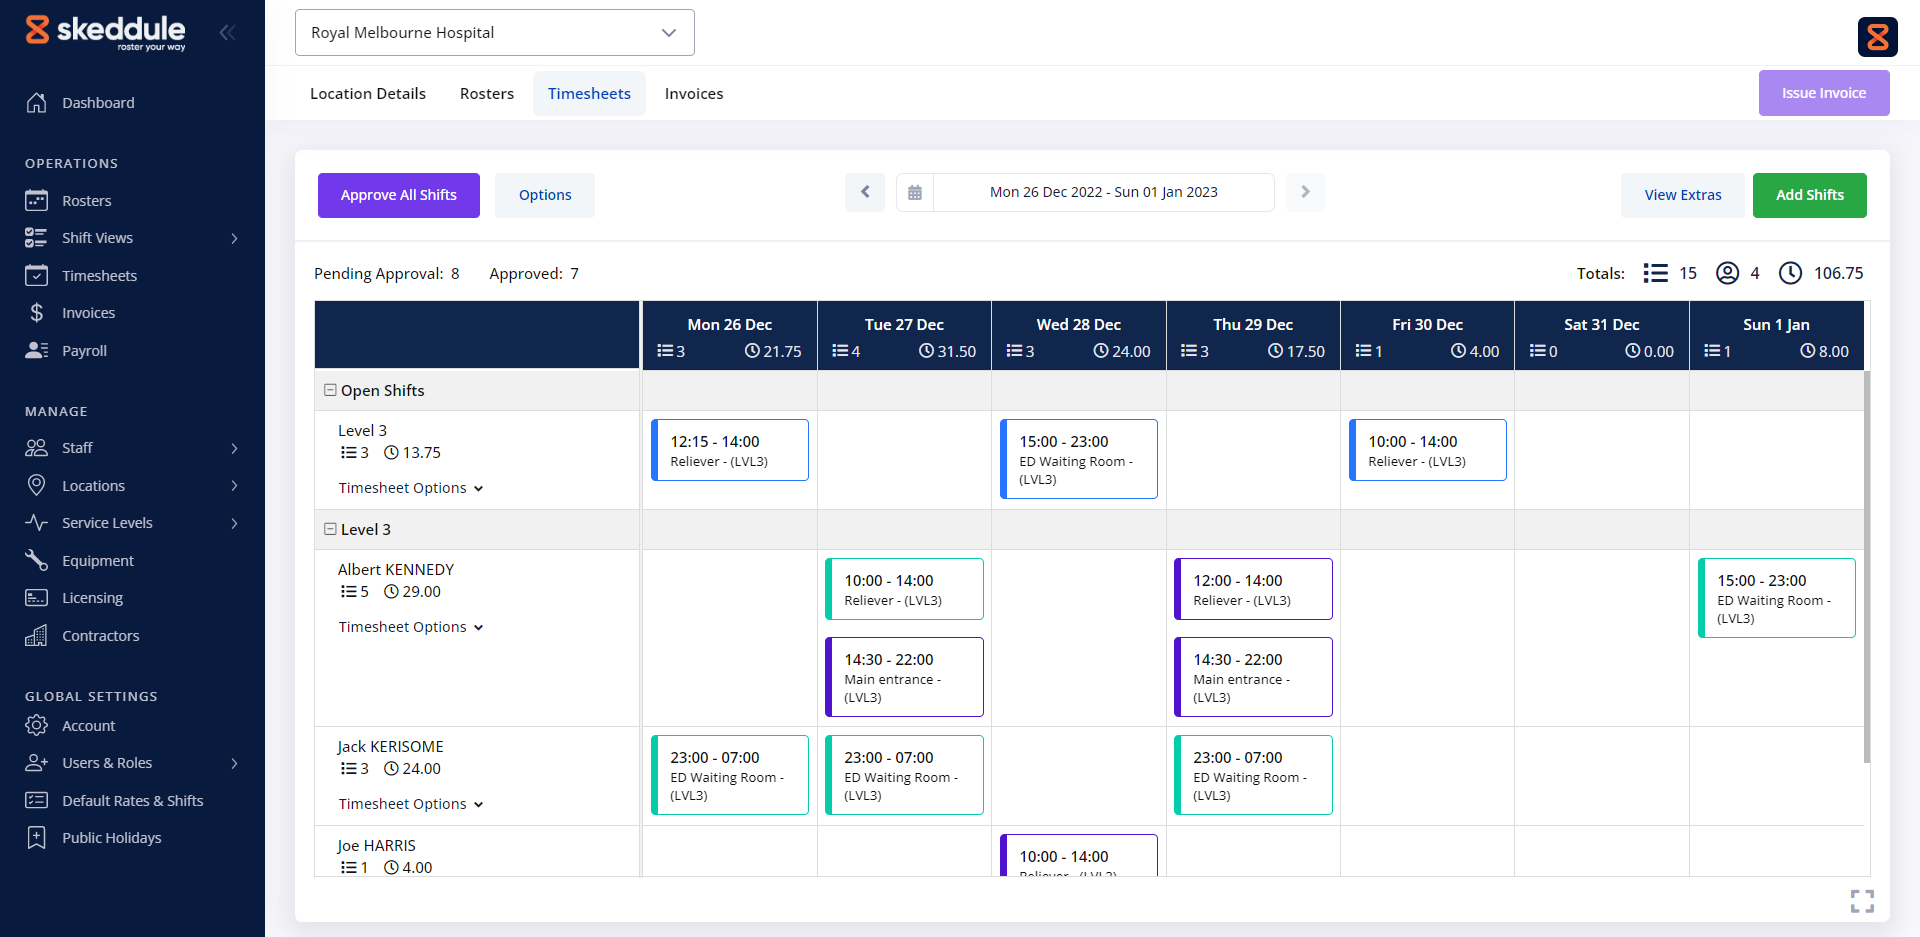
The timesheet calendar is where you can visualise the scheduled shifts for the previous week. It is divided into three sections: the navigation menu, the toolbar and the calendar.
Navigation Menu
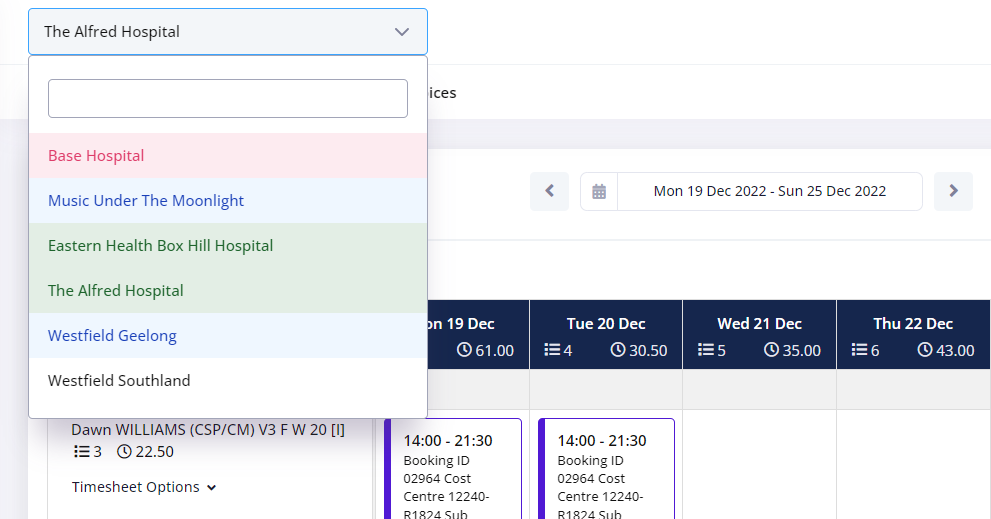
The navigation menu is comprised of a dropdown style field that displays the name of the current timesheet, as well as shortcuts to quickly jump to other sections relevant to this location/client.
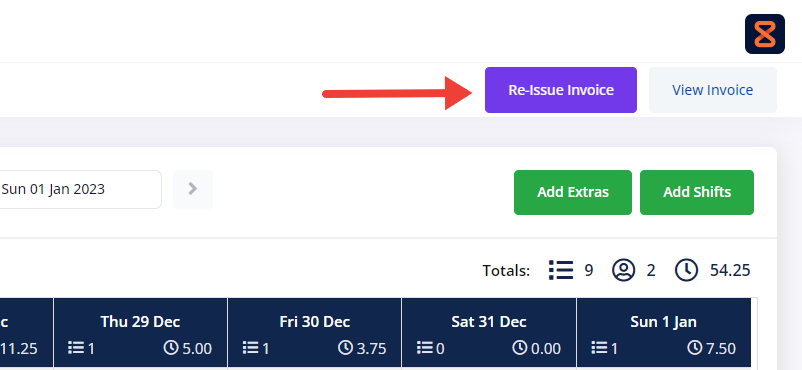
On the far right you will find the Issue Invoice and View Invoice buttons. These options will show as disabled until all shifts are approved.
The dropdown menu allows you to quickly jump between timesheets. The options maintain the same colour coding as seen on the timesheet listing page.
Toolbar
In the toolbar section, you will find the functionalities needed to adjust the timesheet as required and speed up the approval process.
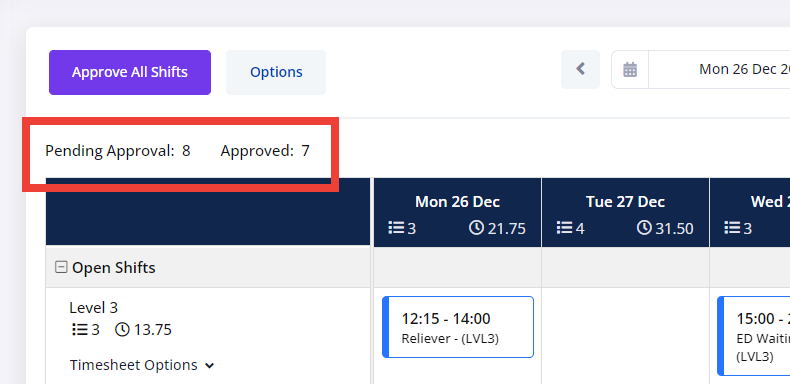
Approve All Shifts: Click this button to bulk approve all shifts in the timesheet.
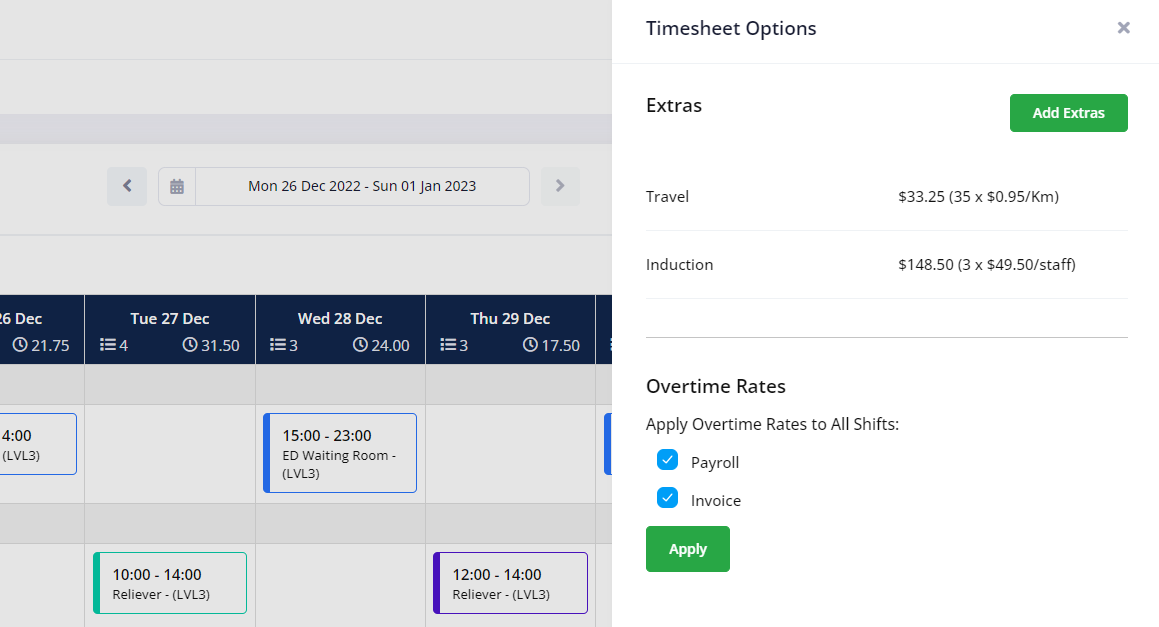
Options: This button opens a side window with settings to customise this particular timesheet. In the windows, you can view the extra charges included in the timesheet, as well as, the overtime setting for all shifts.
Week Selection: Allows you to select and view a specific date or week period.
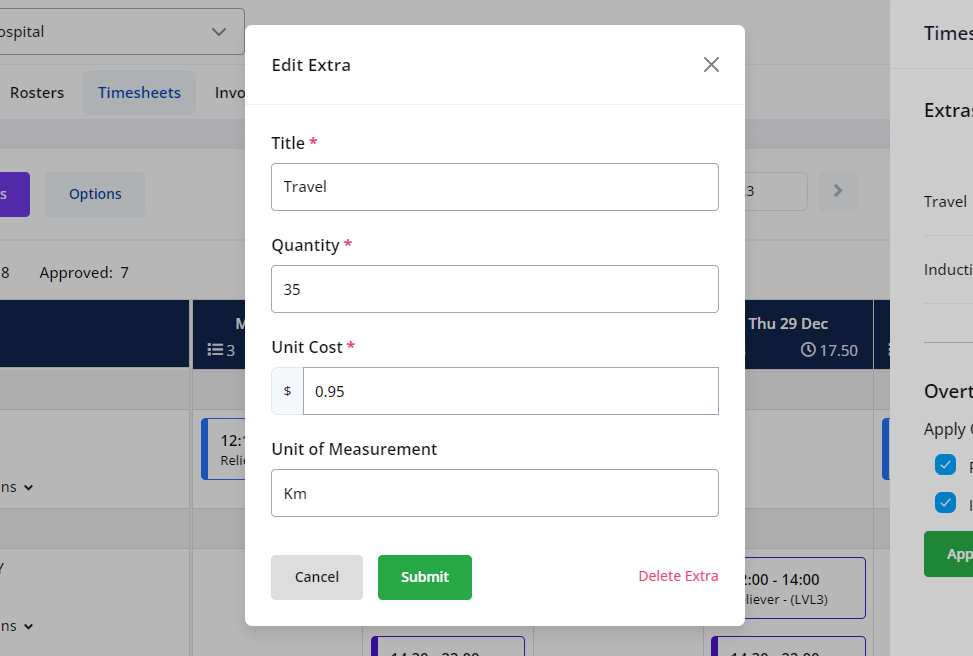
Add Extra: This button opens up a popup window with a form to add single extra costs such as travel, training, reporting, etc. To do so, enter the name of the charges followed by the quantity/units charged, the unit cost and finally the unit of measurement or unit name.
The system automatically calculates the total charges based on the quantity and dollar values.
Add Shift: Click this button to open the New Shift form and add them to the timesheet.
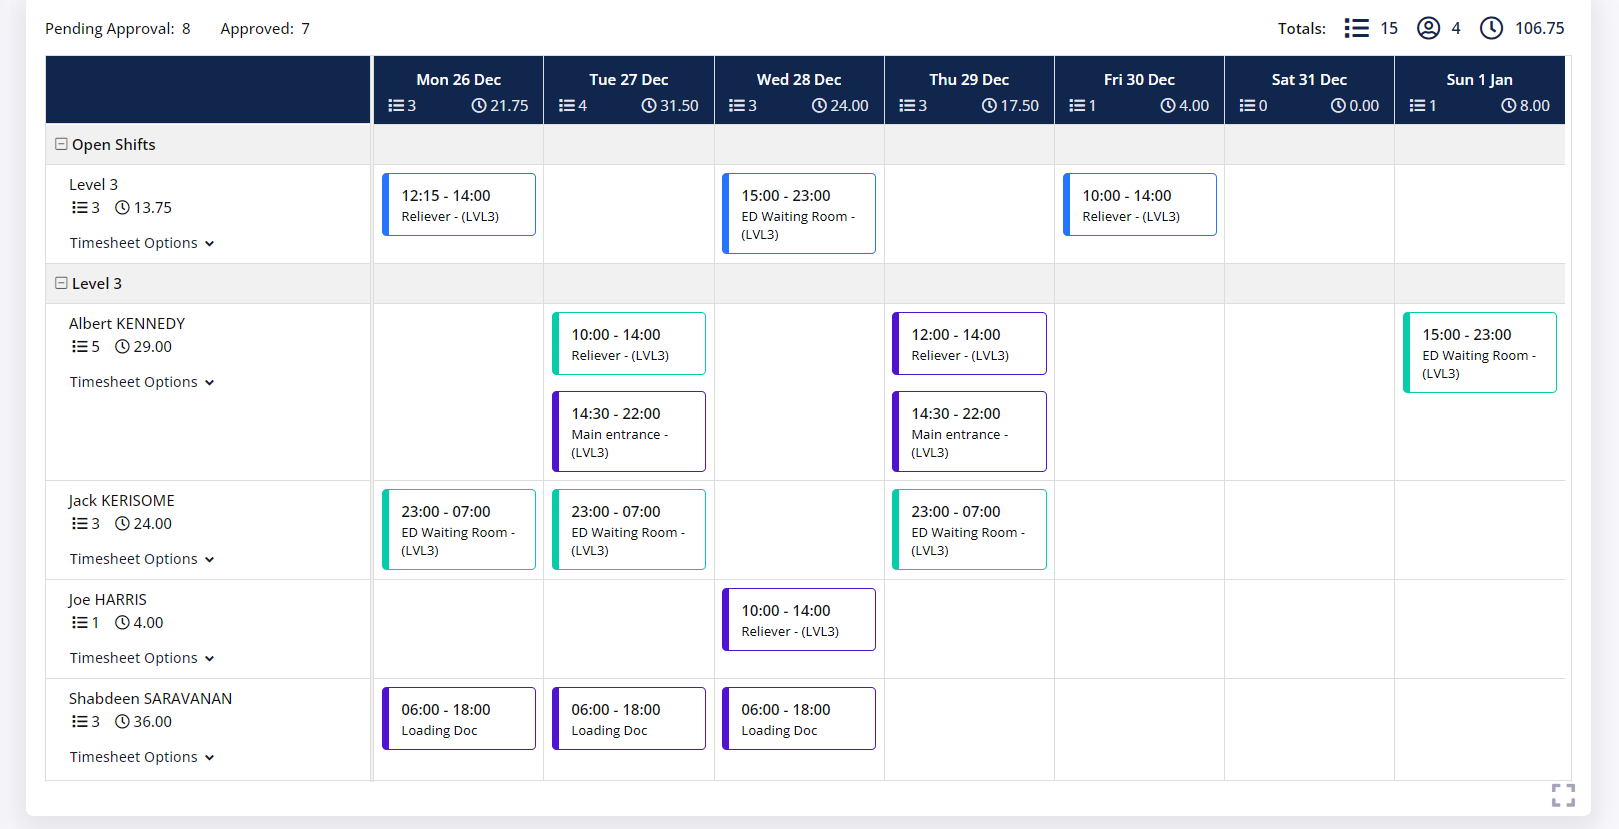
Calendar
The timesheet calendar displays all the shifts added to the roster (regardless of their status) for the given week.
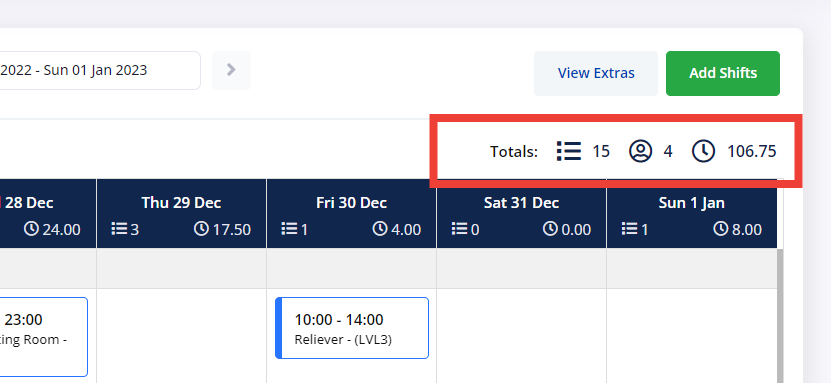
Above the calendar, on the right-hand side, you will find the timesheet’s key metrics at glance. These metrics cover:
Number of Shifts
No. of Staff Rostered
Total Hours Rostered
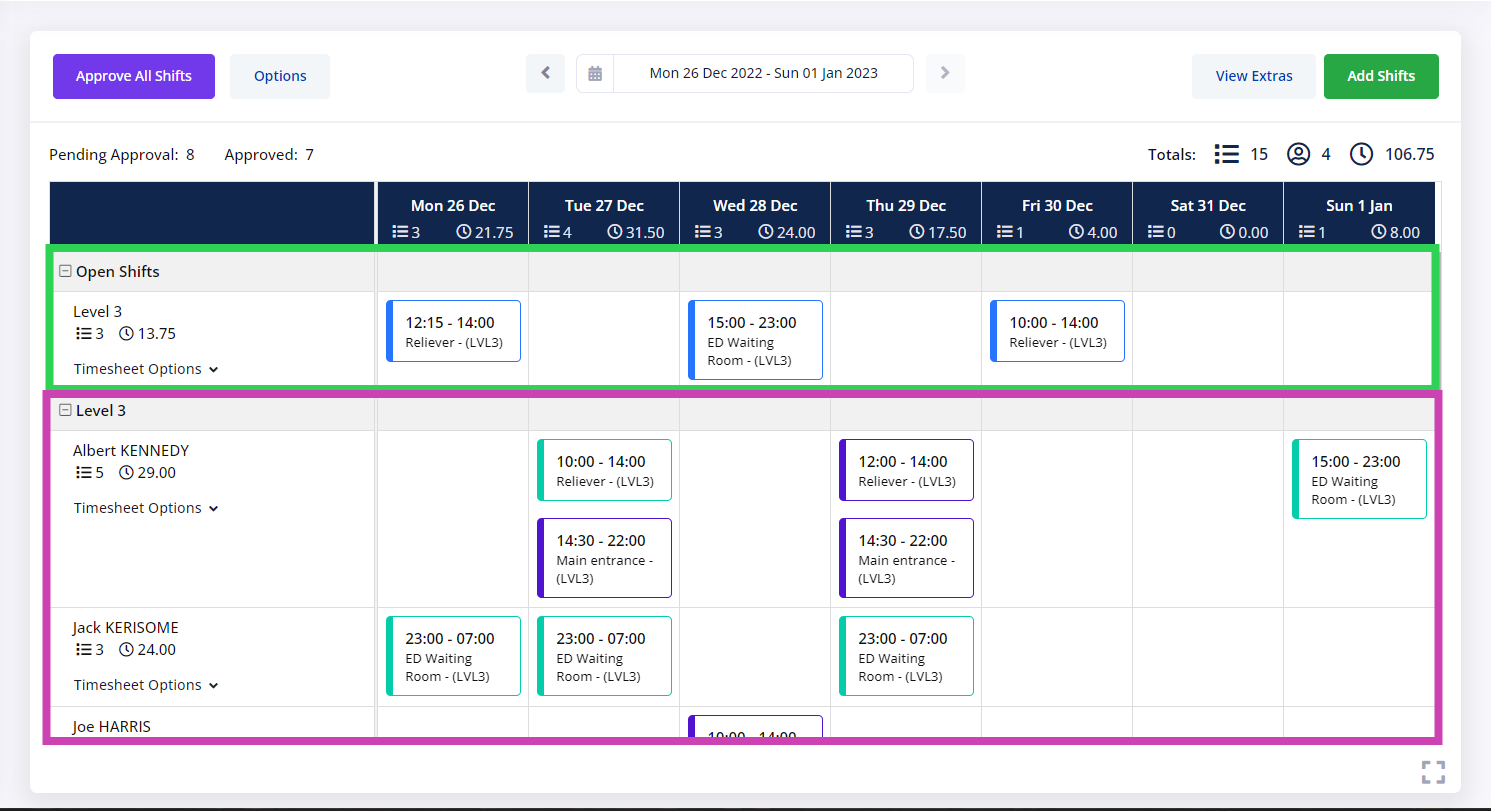
Above the calendar, on the left hand side you will find a counter for each of the two shift statuses: Pending Approval and Approved.
The header of the calendar displays the day of the week. Under each day there are two metrics available:
No of shifts
Total rostered hours
On the Y axis, on the left-hand side, the calendar lists the staff assigned to shifts. There are two metrics per row or staff:
No of shifts
Total rostered hours
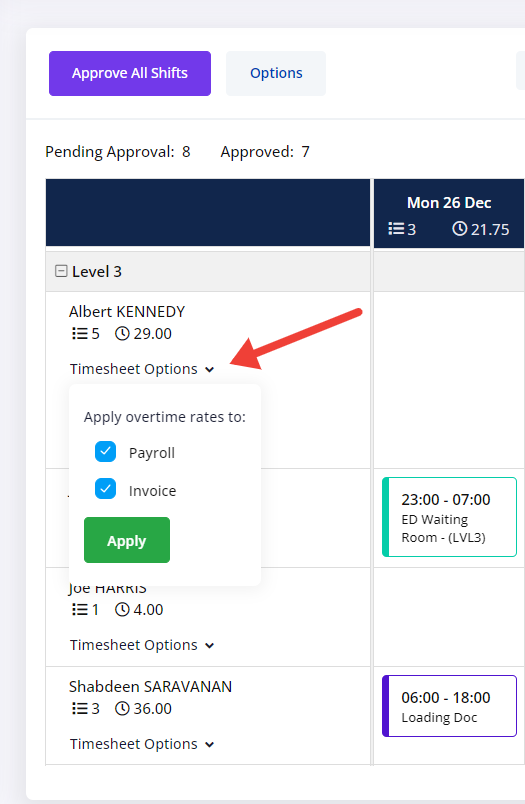
Timesheet Options: Additionally, you can apply over time setting for all shifts on that row.
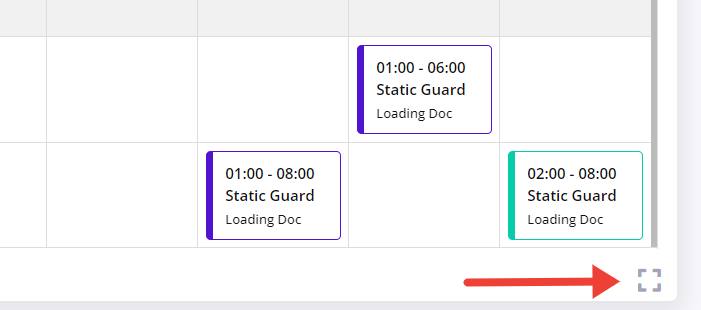
At the bottom, on the right-hand side, you will find the fullscreen option which expands the calendar to cover most of the screen and hides away any of the elements that are not required for managing timesheets.
Calendar Structure
The calendar replicates the same structure of the roster. The body of the calendar is divided horizontally to group shifts by Service Levels. Additionally, there is an extra section that displays any Open Shifts.
In the example below, the calendar is broken up into three sections:
Open Shifts
Level 3
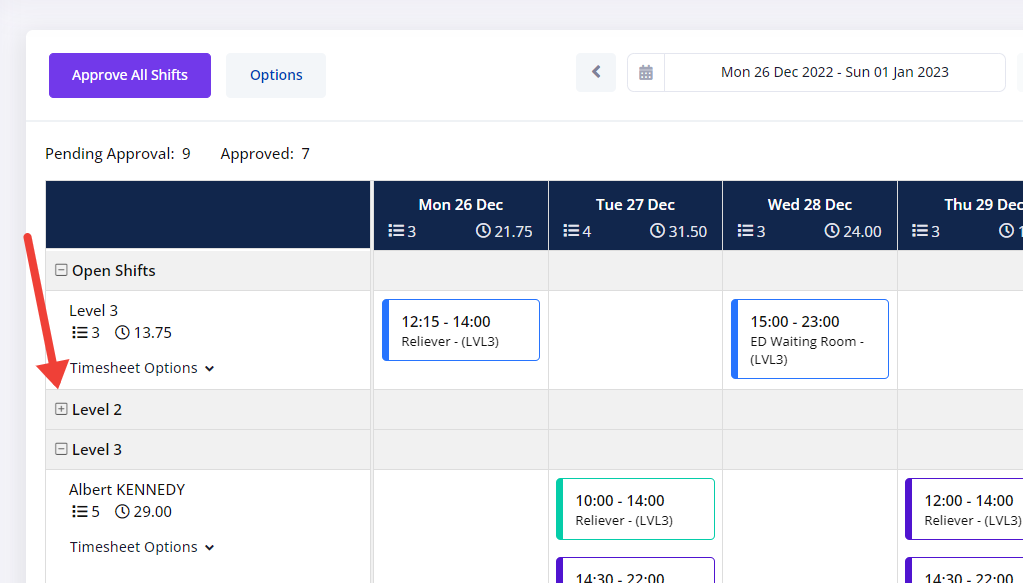
You have the option to collapse one or multiple Service Level sections to help you focus when working on timesheets with a large number of shifts.
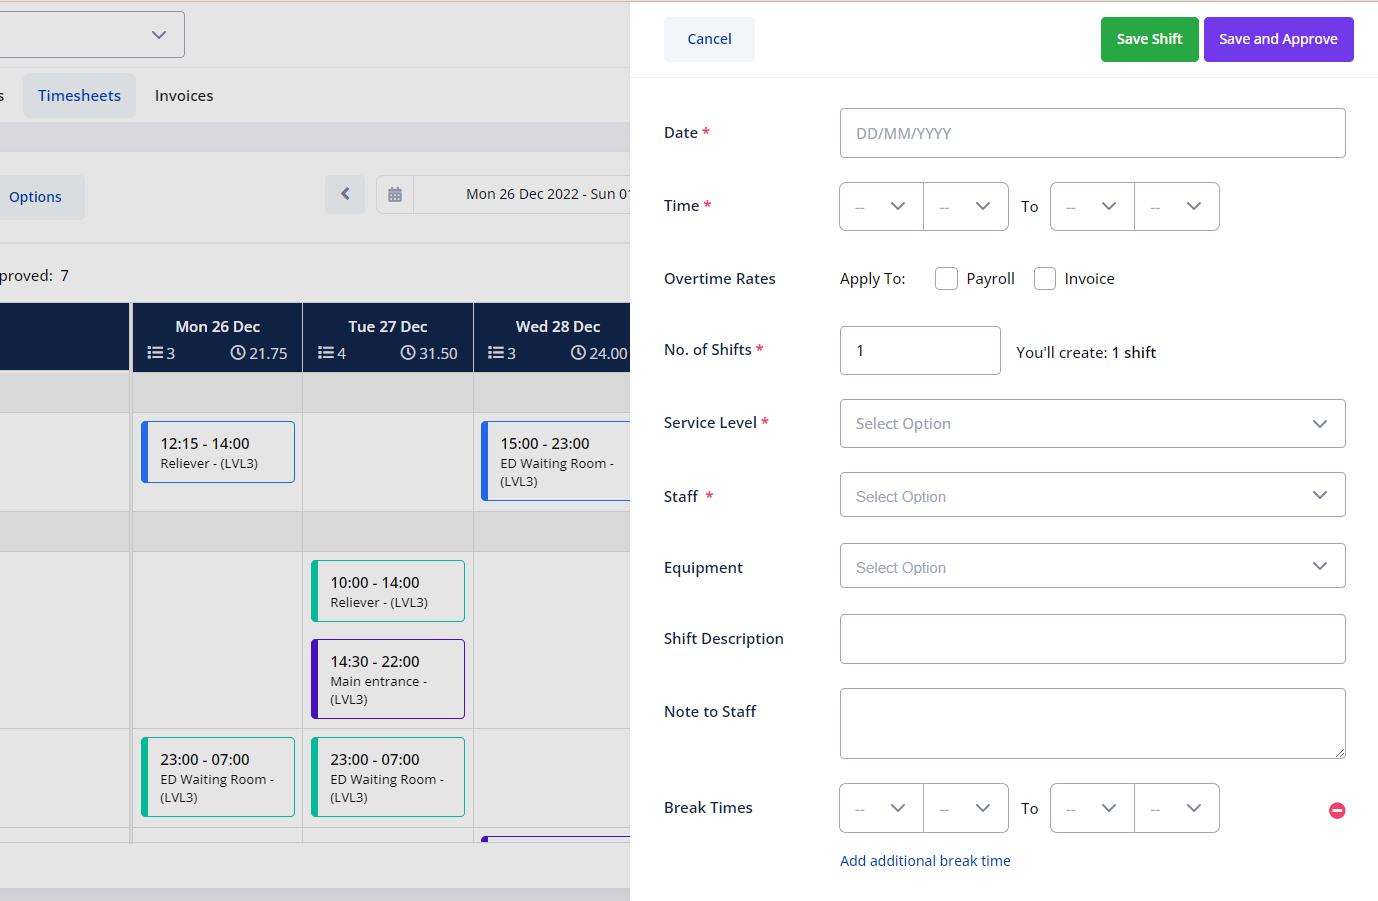
Adding Shifts
While working on timesheets, you still have the option to add shifts to the calendar to ensure the scheduled week matches with the actual workweek.
To add a shift simply click the Add Shift on the right-hand side of the toolbar section. The shift will slide on the screen for you to fill in
IMPORTANTAdding, updating or deleting shifts in the timesheet will also get reflected in the location's roster page.
Date: You can select one or multiple dates within the same week.
Time: Select the start and end time of the shift. The total shift duration will display on the right-hand side.
Overtime Rates: Select whether you would like the system to calculate overtime if it applied to this shift.
No. of Shifts: Select the number of shifts you would like to create for each selected date. Selecting two or more Shifts will allow you to also select multiple Staff at the same time.
Service Level: Choose from the list of available Services for that location.
Activity: If the selected Service Level has been linked to one or multiple Activities, then you will have the option to choose an Activity on this field. Unlike Service Levels, the Activity fields are optional.
Staff: Once the dates, times and service levels are selected, the system will automatically display the staff that are available to perform the shift and highlight those that aren’t.
Yellow highlight: will display a warning message however the staff can still be selected for that shift
Red highlight: will display an unavailability message indicating that the staff cannot be selected.
Equipment: Select the required equipment to perform the shift.
Shift Description: Add a descriptive title for the shift so it is easily identifiable.
Break Times: Enter one or multiple break periods times that took place during the shift.
IMPORTANTFor important payroll and invoicing purposes, break time periods are excluded from the total shift duration.
Mobile App Shift Times
When staff uses the mobile application to sign on and off a shift, these timestamps are sent to the system and recorded against the shift. Both the scheduled and actual times can be seen in the rosters and timesheets.
The mobile app has the option to record time breaks which are also pushed into the system and recorded in the timesheets.
Lastly, you have the option to allow the sign-on and off times recorded via the mobile app to override the scheduled times. Visit Account Setup for more information.
Approving Shifts
Approving shifts is a required step to generate invoices.
To approve shifts, you can either do it one shift at a time or all at once by using the “Approve All Shifts” button at the top left corner of the page.
When approving a shift, it will change the status and colour to purple. You can always change the shift status back to “unapproved” (green) in the future.
Issuing Invoices
As mentioned previously, the timesheet is an extension of the roster calendar page. As such it lists all shifts in the roster regardless of their status.
However, to issue an invoice all shifts in the timesheet must be approved. Once all shifts are set to Approved, the Issue Invoice button located at the top right corner will be enabled and you will be able to generate the invoice.
After clicking the Issue Invoice button, you will be redirected to the Invoice page where you can either download a copy or email the invoice to your client directly from the system using the built-in contact form.
If you need to amend the timesheet after generating the invoice, you will need to reissue a new invoice to reflect the latest updates to the timesheet.