Rosters are one of the core sections of the system. Here you can add and publish shifts to your workforce as well as share the roster with clients.
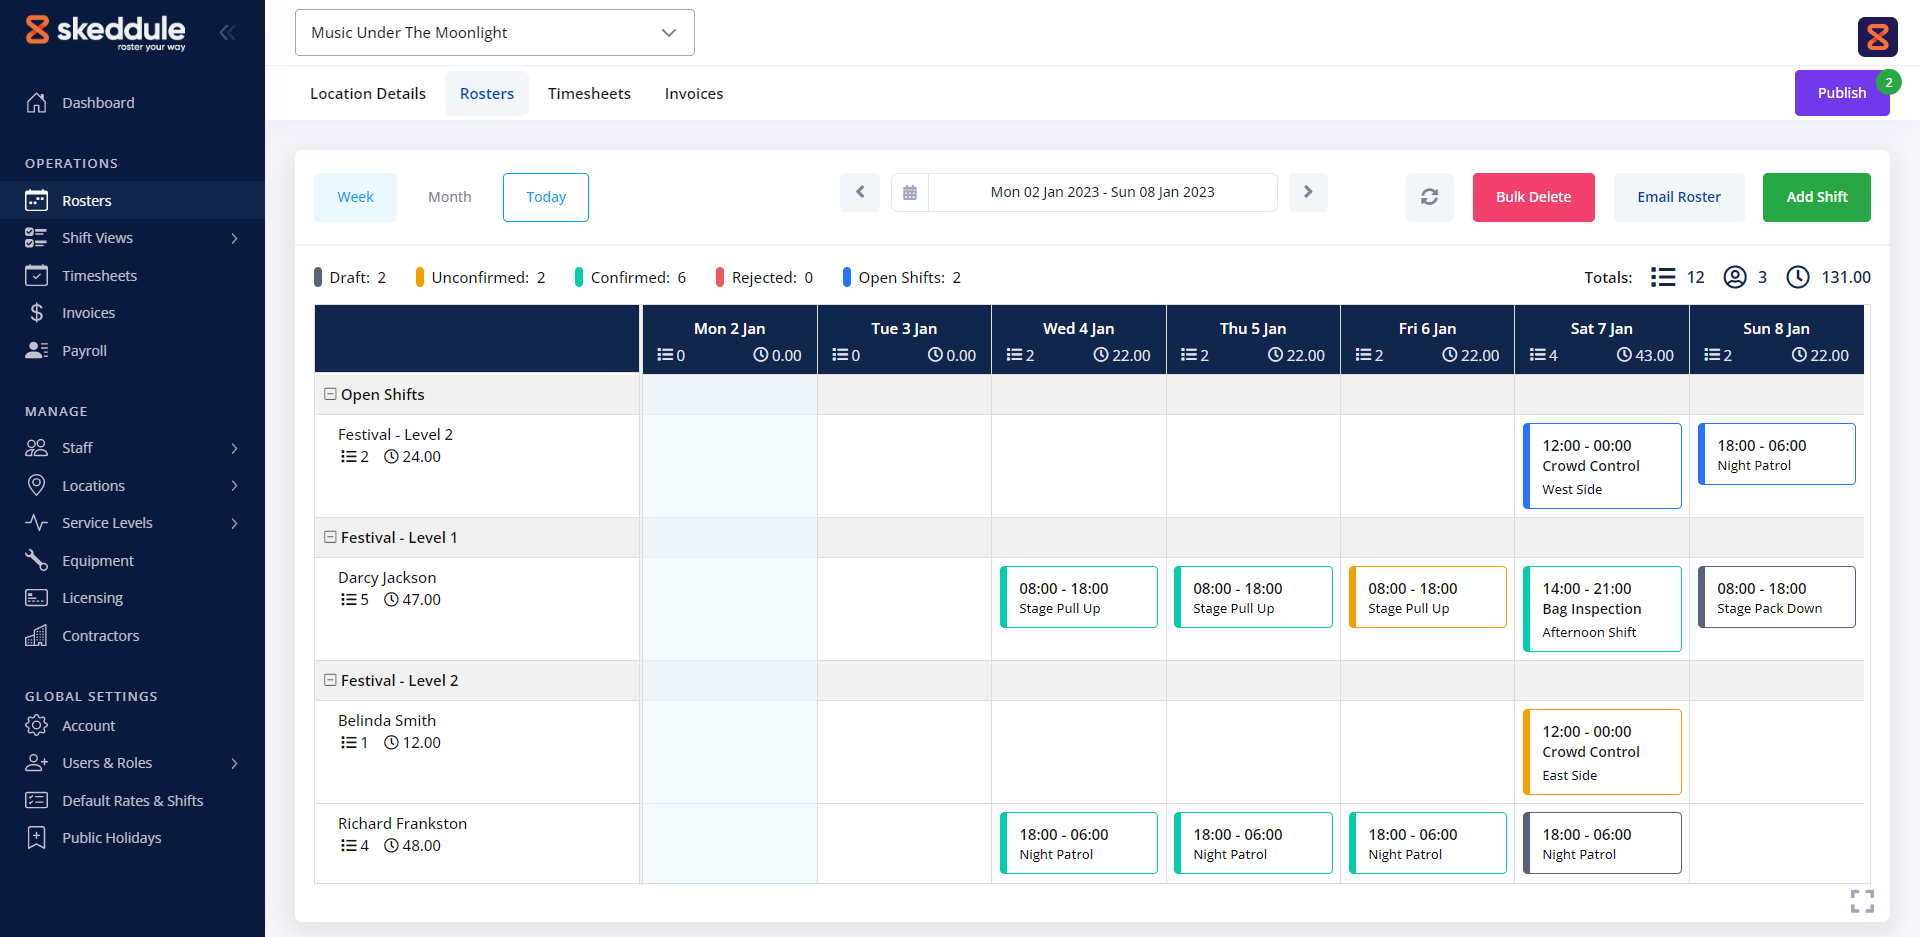
The roster’s calendar is the main section of the roster where you can visualise the workweek and scheduled shifts. The roster calendar page is divided into three sections: the navigation menu, the toolbar and the calendar.
Navigation Menu
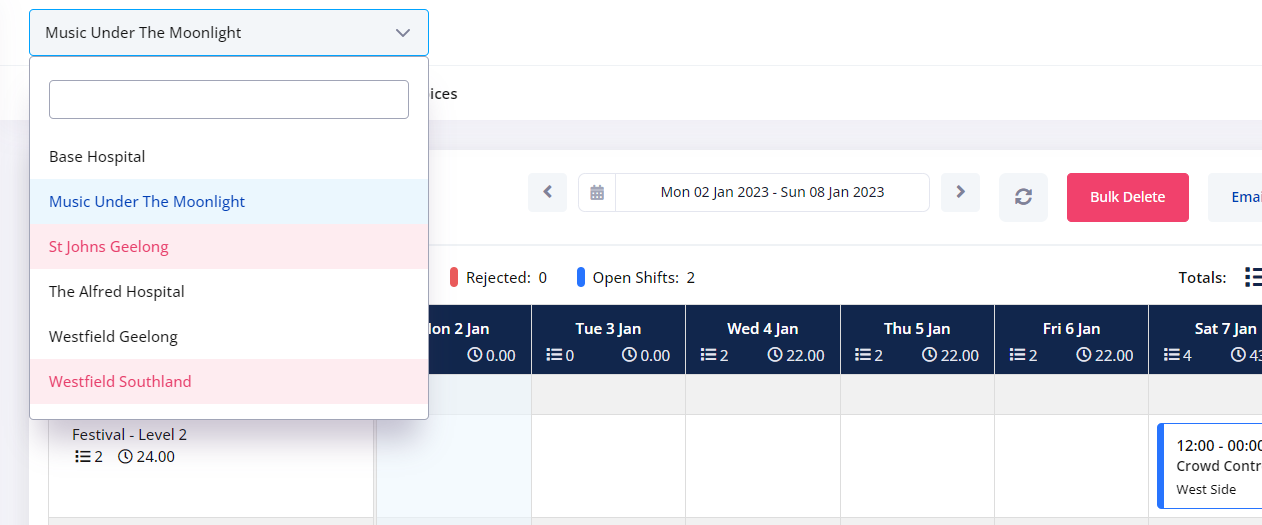
The navigation menu is comprised of the dropdown style field which displays the name of the current roster, as well as shortcuts to quickly jump to other sections relevant to this location/client.
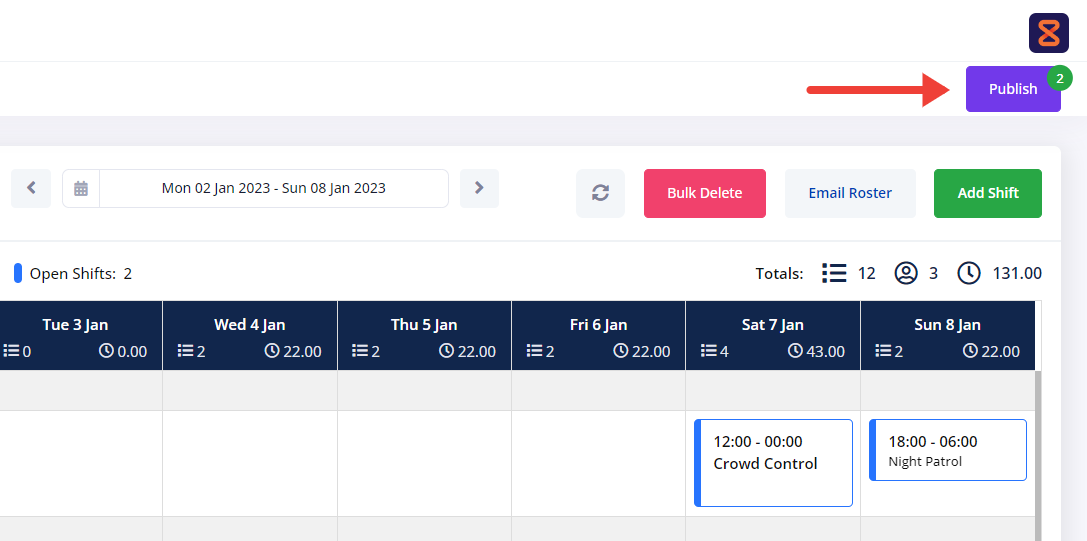
On the far right you will find the Shift Publish button used to send out all Draft shifts to the assigned staff.
The dropdown menu allows you to quickly jump between rosters. These maintain the same colour coding as seen on the Roster Listing page
Toolbar
In the roster’s toolbar, you will find the functionalities needed to manage your rosters efficiently.
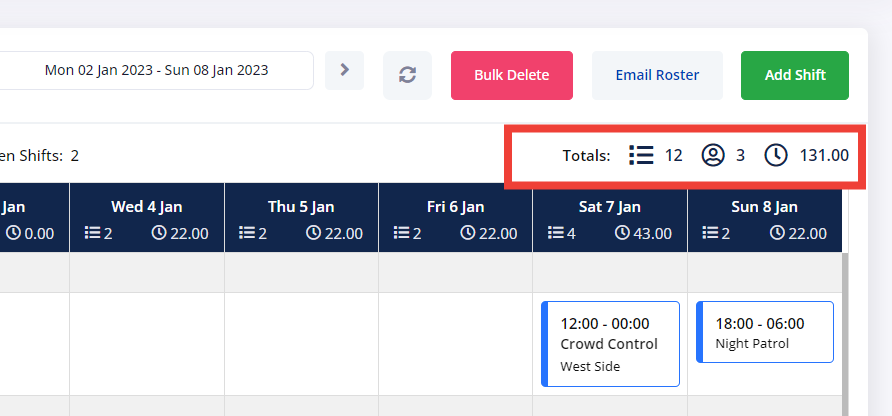
View: Select between Week or Month to view rosters.
Week Selection: Allows you to select and view a specific date or week period.
Refresh: Click the refresh button to see the recently published shift change status.
Bulk Delete: This allows you to select multiple shifts and delete them at once.
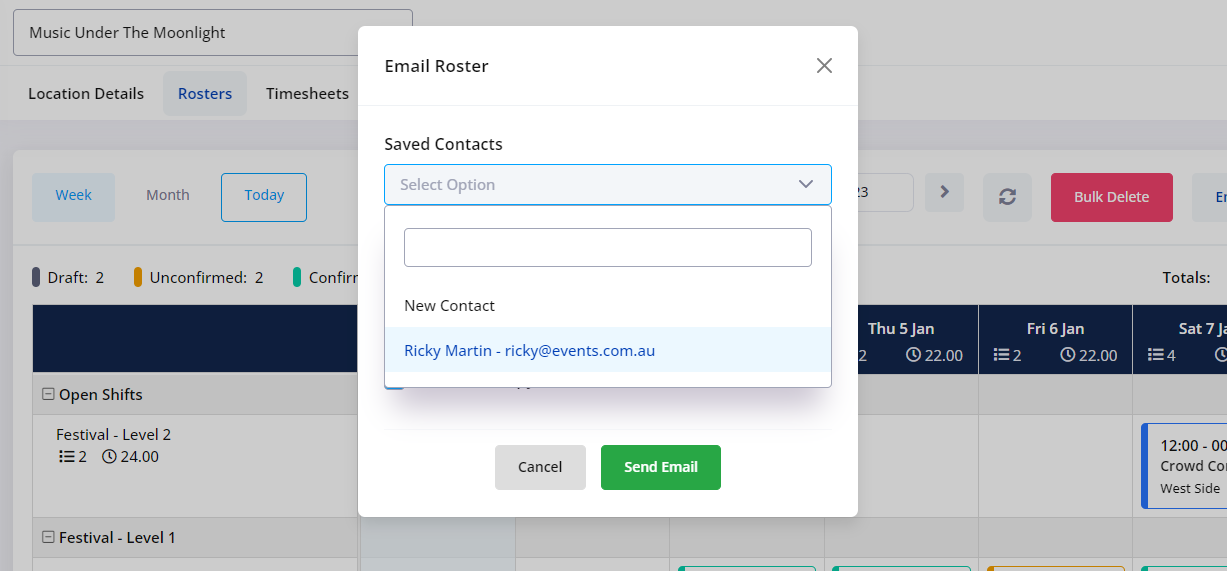
Email Roster: Quickly send a pdf copy of the roster to any of your contacts added to the location or client. You can also enter a contact name and email manually.
Add Shift: Click the Add Shift button to open the New Shift form.
Calendar
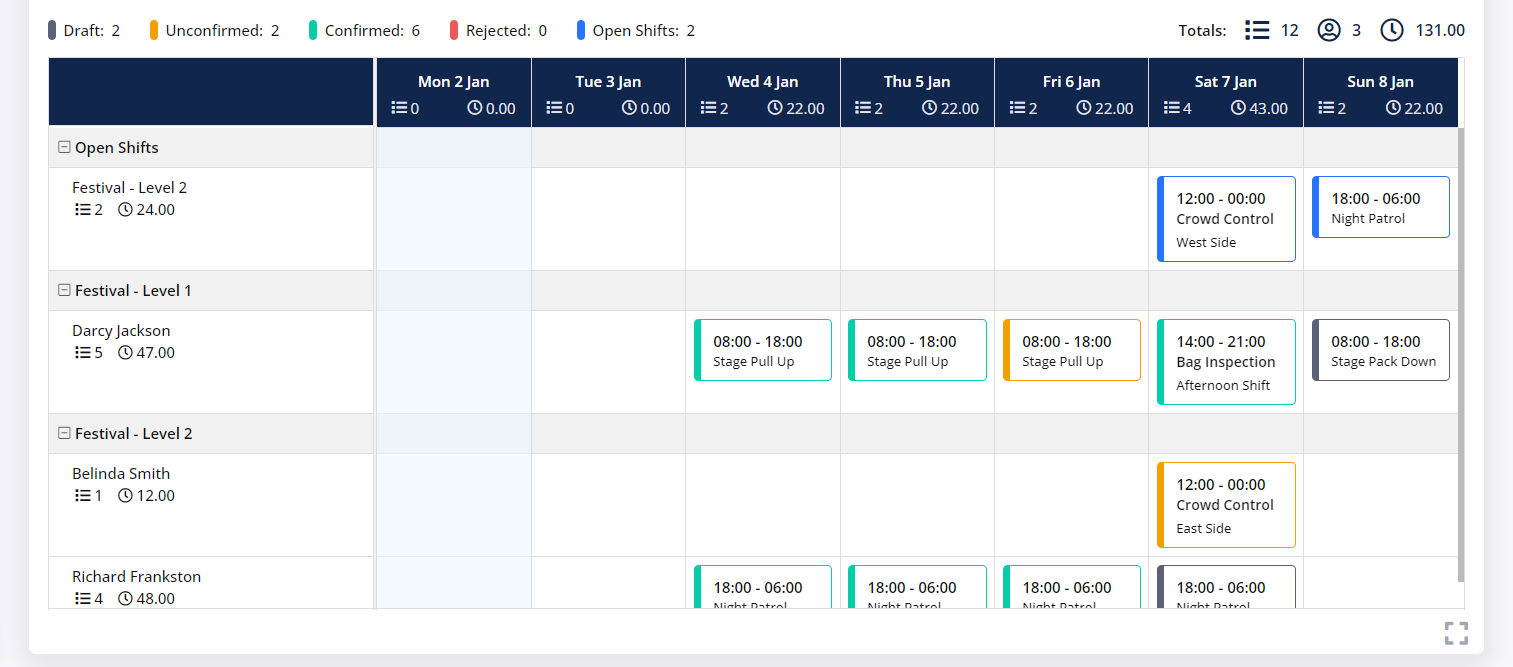
The calendar displays all the shifts added to the roster for the given week.
Above the calendar, on the right-hand side, you will find the roster’s key metrics at glance. These metrics cover:
Number of Shifts
No. of Staff Rostered
Total Hours Rostered
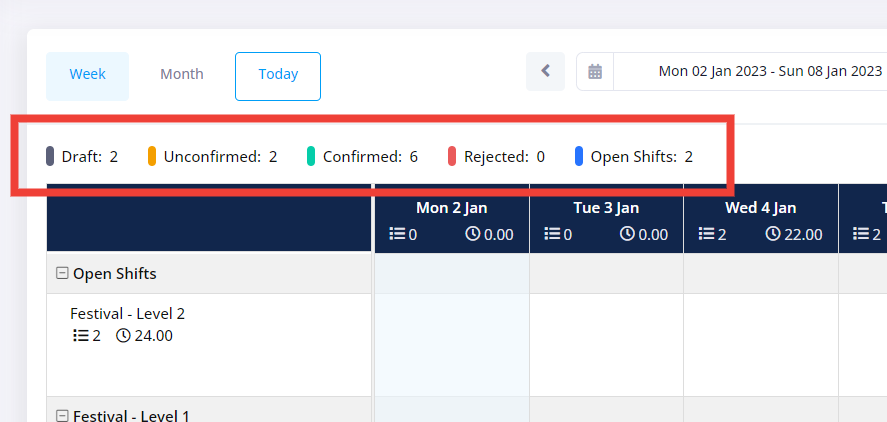
Above the calendar, on the left-hand side, you will find the rostered shift categories based on their status.
Draft: Shifts that have not been published
Unconfirmed: A published shift and waiting for the staff to either confirm or decline.
Confirmed: A published shift has been confirmed by the staff.
Rejected: A published shift that has been declined by the staff.
Open Shifts: A shift that has not been assigned to any staff.
The header of the calendar displays the day of the week/month. Under each day there are two metrics available:
No of shifts
Total rostered hours
On the Y-axis, on the left-hand side, the calendar lists the staff assigned to shifts. There are two metrics per row or staff:
No of shifts
Total rostered hours
At the bottom, on the right-hand side, you will find the full-screen option which expands the calendar to cover most of the screen and hides away any elements that are not required for rostering.
Calendar Structure
The body of the calendar is divided horizontally to group shifts by Service Levels. Additionally, there is an extra section that displays any Open Shifts.
In the example below, the calendar is broken up into three sections:
Open Shifts
Festival – Level 1
Festival – Level 2
You have the option to collapse one or multiple Service Level sections to help you focus when working on rosters with large amounts of shifts.
Adding a Shift
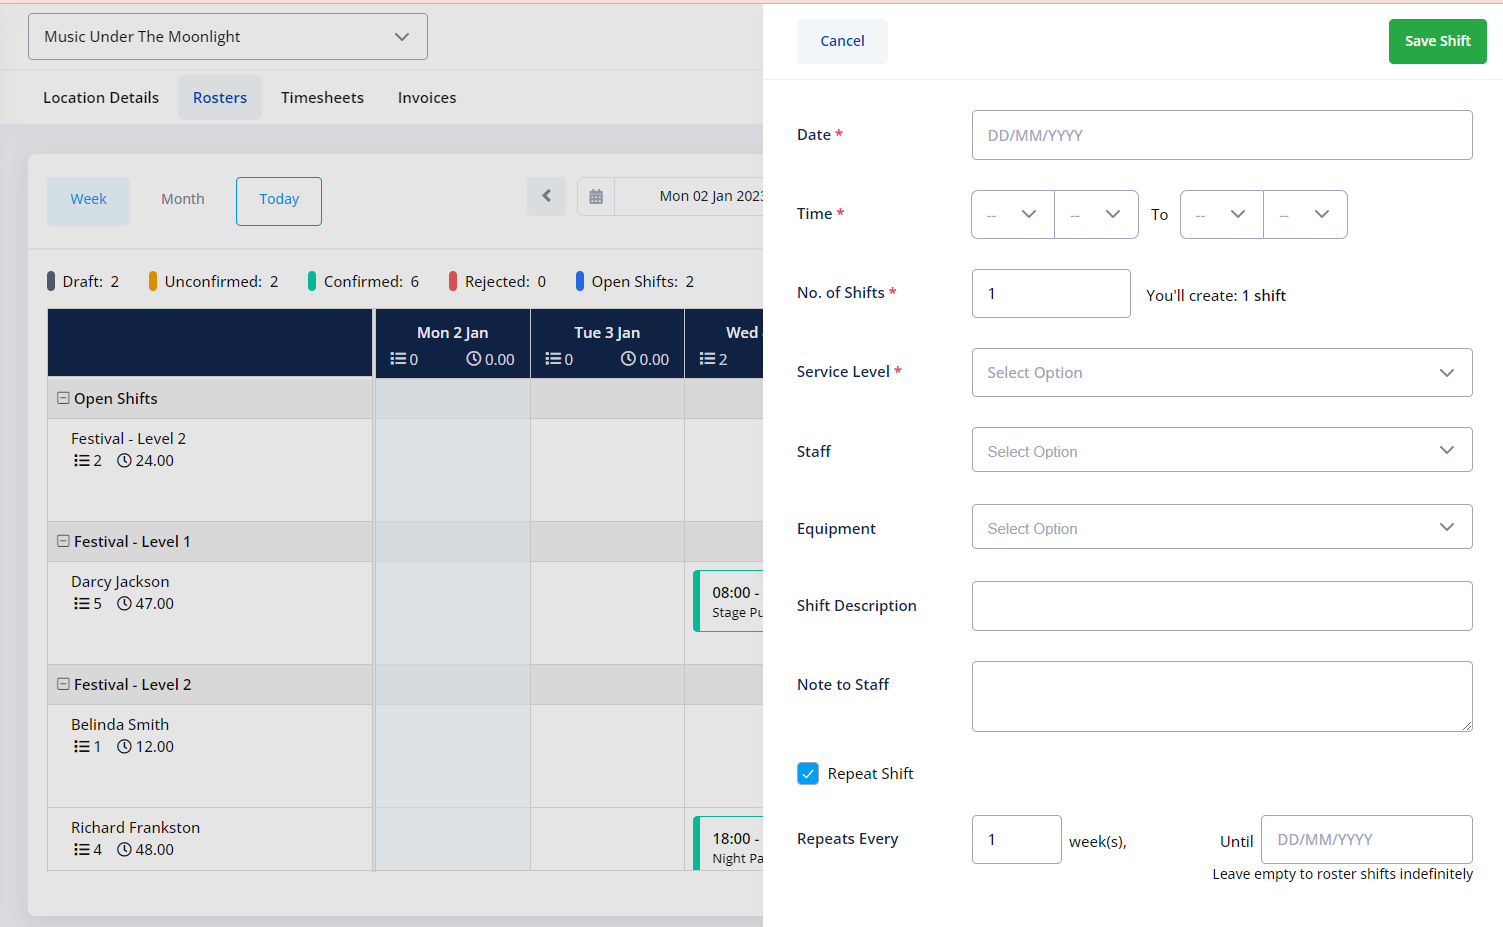
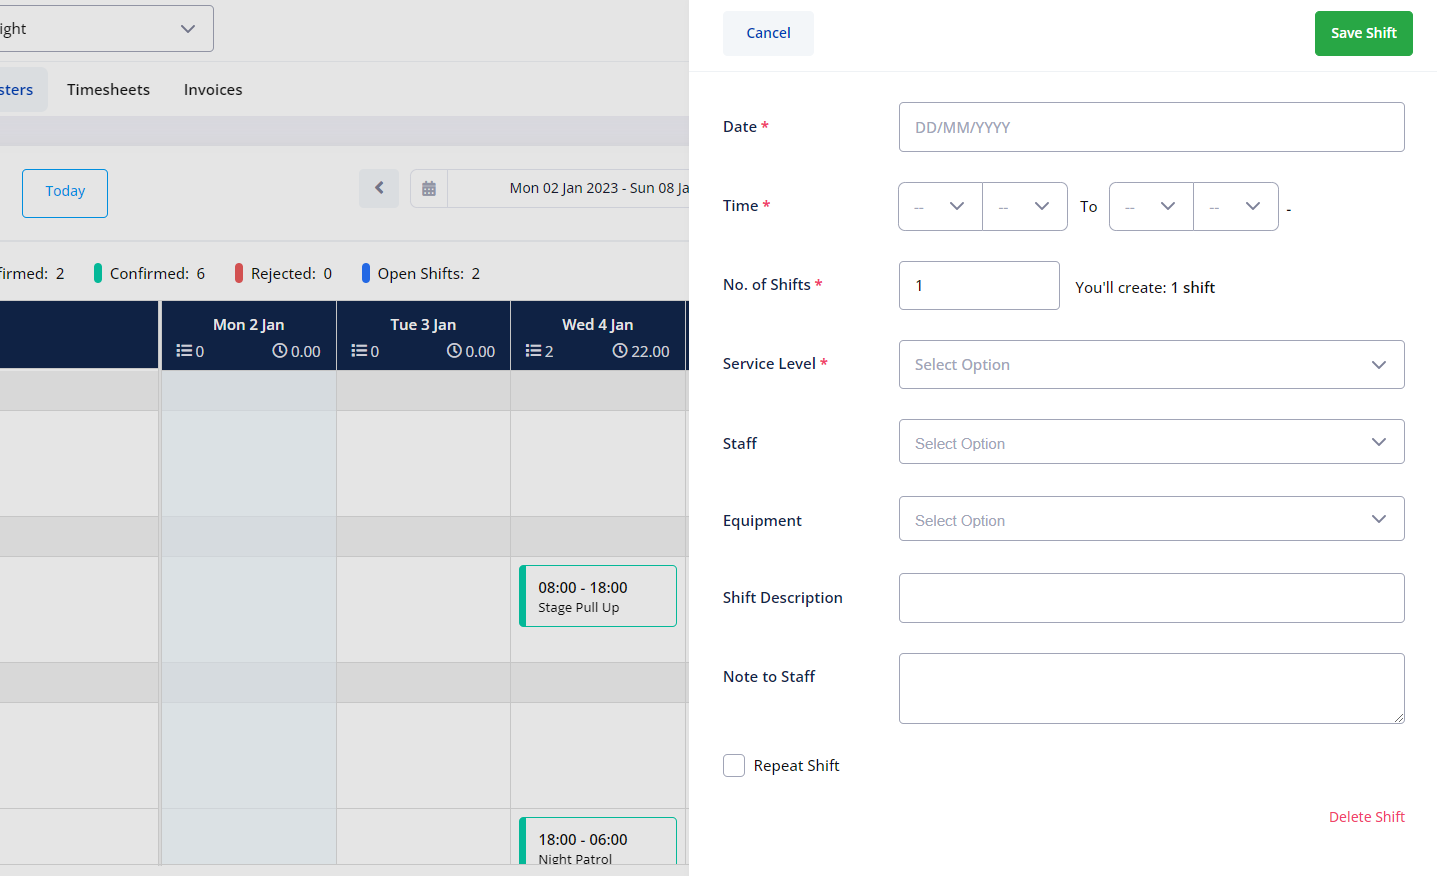
To add a shift simply click the Add Shift on the right-hand side of the toolbar section. The shift will slide on the screen for you to fill in.
The new shift form contains four required fields and five that are optional Next we will list and explain every field within the shift form:
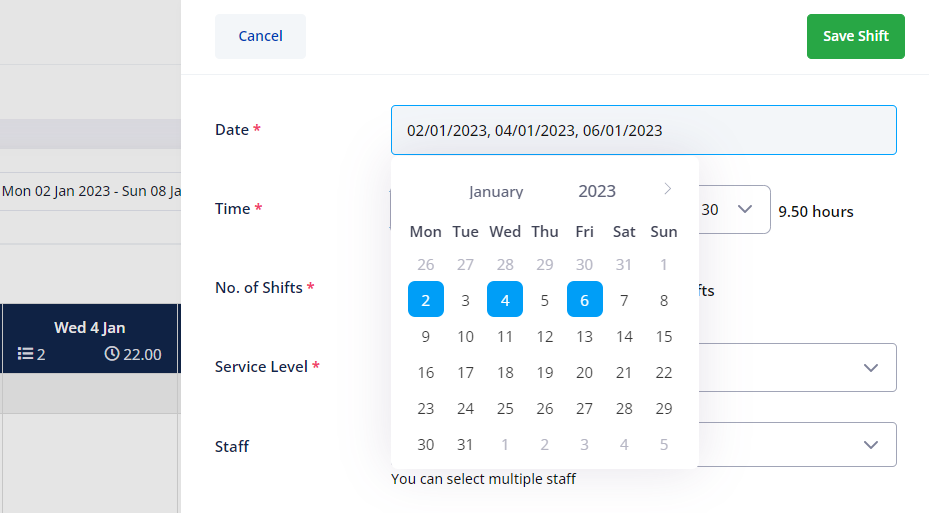
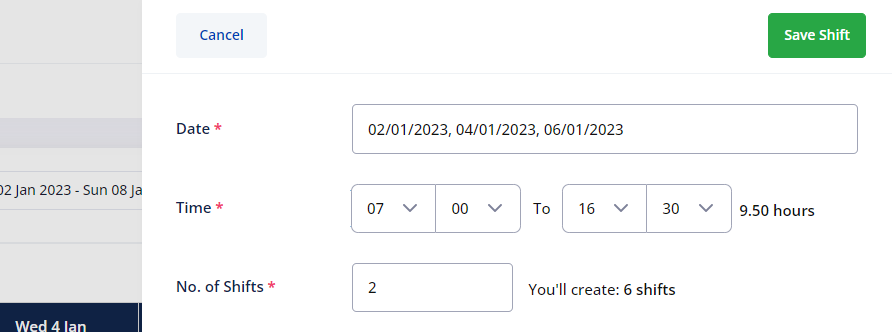
Date: You can select one or multiple dates within the same or different weeks.
Time: Select the start and end time of the shift. The total shift duration will display on the right-hand side.
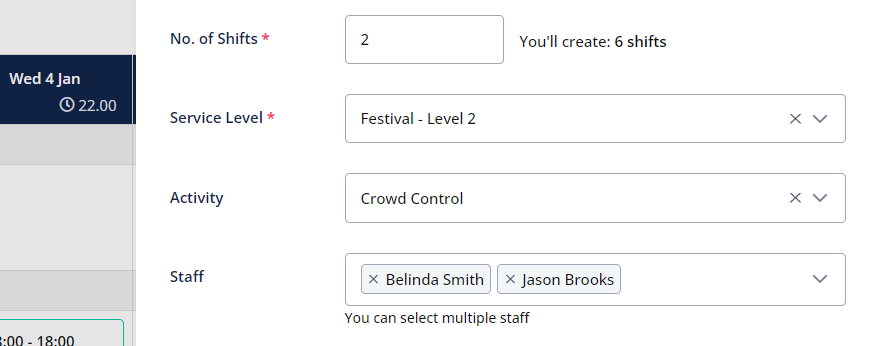
No. of Shifts: Select the number of shifts you would like to create for each selected date. Selecting two or more Shifts will allow you to also select multiple Staff at the same time.
Service Level: Choose from the list of available Services for that location/roster.
Activity: If the selected Service Level has been linked to one or multiple Activities, then you will have the option to choose an Activity on this field. Unlike Service Levels, the Activity fields are optional.
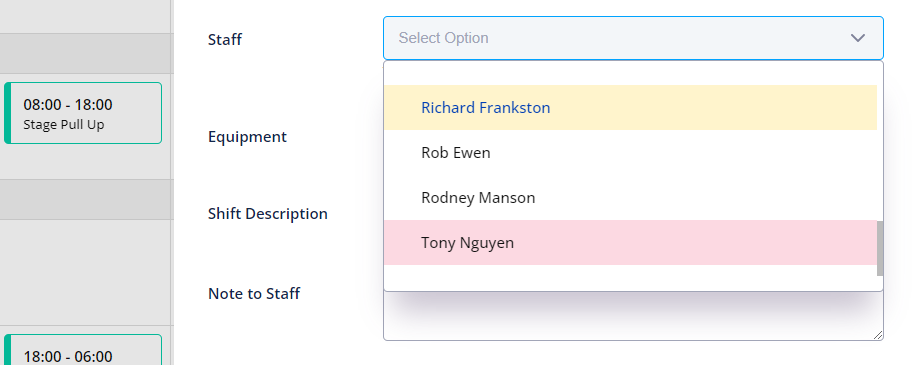
Staff: Once the dates, times and service levels are selected, the system will automatically display the staff that are available to perform the shift and highlight those that aren’t.
Yellow highlight: will display a warning message however the staff can still be selected for that shift
Red highlight: will display an unavailability message indicating that the staff cannot be selected.
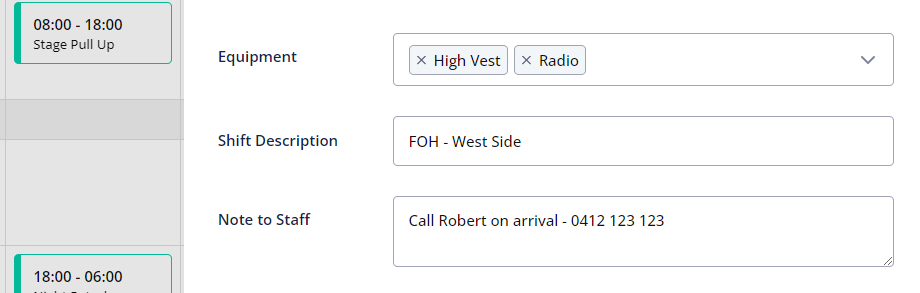
Equipment: Select the required equipment to perform the shift.
Shift Description: Add a descriptive title for the shift so it is easily identifiable.
Note to Staff: Add a note to communicate shift-specific information to the staff assigned.
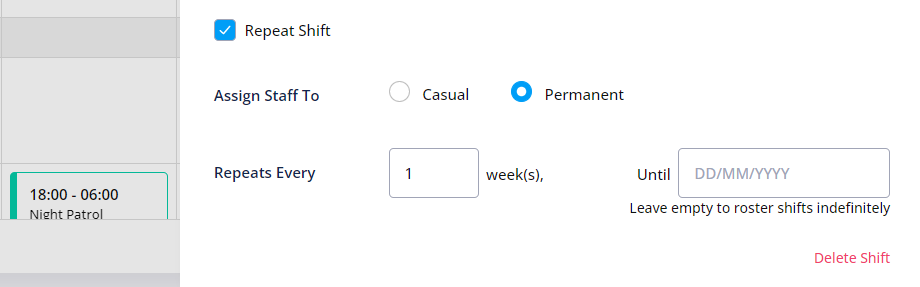
Repeat: Check this box if you would like to create a sequence of shifts rather than a single shift.
If a staff has been selected, you will have the option to assign the staff the full sequence of shifts (permanent) or only assign them the current shift (casual). When selecting to make a staff Casual, all future shifts in the sequence will be created as Open Shifts.
Lastly, you can select an end date for the sequence or leave it empty to make the shift sequence indefinitely.
Publishing Shifts
When publishing shifts, you will be sending out a request for the relevant staff to confirm whether they can work the shift or are unavailable.
Only the (black) Draft shifts can be published from the roster page.
Once published, the shifts previously shown as “Draft” (black) will change status to “Unconfirmed” (orange).
When staff confirms their availability via the mobile app or web portal, the shift will change the status again to “Confirmed” (green). However, if staff declines to work, the shift status will change to “Rejected” (red).